

Today I want to share a practice that I genuinely wish every single person on our planet would know about. Why?
Because it’s such an easy to follow process, one you can do by yourself, and doesn’t really take much time or special preparation – yet is so potent and effective that it sometimes still blows my mind that something like this exists.
That modality is EFT.

I first became acquainted with EFT or Emotional Freedom Technique during a personal development and manifestation course I took several years ago. The EFT used there involved scripting throughout the tapping process and was missing some of the elements I later on learned through Clinical EFT and found to be extremely beneficial. Still, even the sort of abridged, slightly different EFT derivative back then had provided results I couldn’t help but recognize for their power of change.
Fast forward a couple of years, I felt a very strong call to educate myself further in EFT. To infuse it more into my daily life. To really hone my skills and actually use this modality as one of my go-to tools in the process of creating a fulfilling life.
This calling led me to getting certified as a Master EFT & TFT practitioner and, honestly, it was one of the best decisions in my life.
If you’re already familiar with EFT, let this blog post be a reminder to perhaps use this wonderful tool you have in your toolkit more often, or serve as a refresher of the knowledge.
If you’re absolutely new to EFT, I will share some more information over the next few paragraphs, lead you through the points, as well as guide you through the tapping sequence so that you can learn and implement this modality into your lives.
I will also be offering a completely free PDF guide at the bottom of the article that you can download and refer back to whenever you need.
So let’s dive right in, shall we…
WHAT IS EFT?
EFT or Emotional Freedom Technique is often known as tapping because that is essentially what you do. You tap on certain points that are located on the body’s meridians, which puts the energy flow back into balance.
EFT evolved from TFT (Thought Field Therapy), but where TFT demands different algorithms for different ailments, EFT is designed to be more of a universal, one-size-fits-all process…and, as such, also a bit easier to learn.
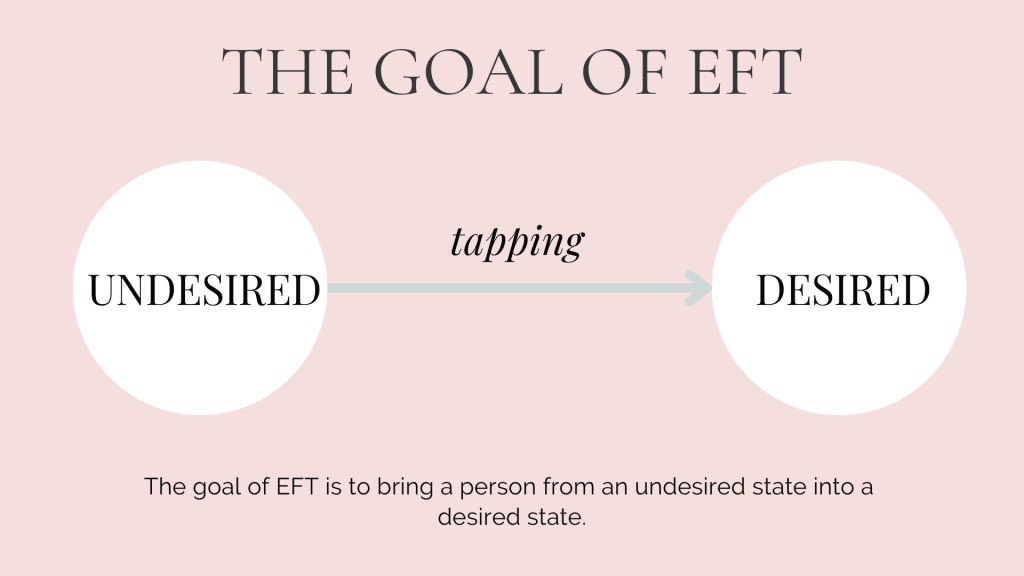
The main objective of EFT is to bring a person from an undesired state into a desired state.
It’s a modality that can be used for basically any kind of ailment – and we’ll get deeper into this a bit later on. First, we’ll learn the points so that you can locate them at ease, and then we’ll dive into the actual process to wrap it all together.
THE EFT POINTS
KARATE CHOP POINT
Located roughly in the middle of the length and slightly toward the top of the width of the outer side of your palm.

TOP OF THE HEAD POINT
Located approximately in line with your ears, in the middle of the top of your head. In Chinese acupressure, the GV22 and GV21 points are found on this line, so I tend to tap with three fingers together to cover both of them.

EYEBROW POINT
Located on the bony area where the eyebrow starts. Depending on the height of the individual’s eyebrow, the point might be slightly below (if the eyebrow is high) or directly on top (if the eyebrow is low) – the main guideline to follow is to find the bone reach (the part of the bone before it curves into the eye socket) and you’ll feel the point there.

SIDE OF EYE POINT
Located on the outer side of the eye, in line with the corner of your eye. You can find the point on the very edge of the bone reach.

UNDER EYE POINT
Located slightly below the edge of the bone (after the soft tissue and before the cheek starts). It roughly aligns with the middle of the eye.

NOSE POINT
Located under the nose, approximately where the roots of the upper teeth start. This is also known as emergency point in Traditional Chinese medicine (GV 26).

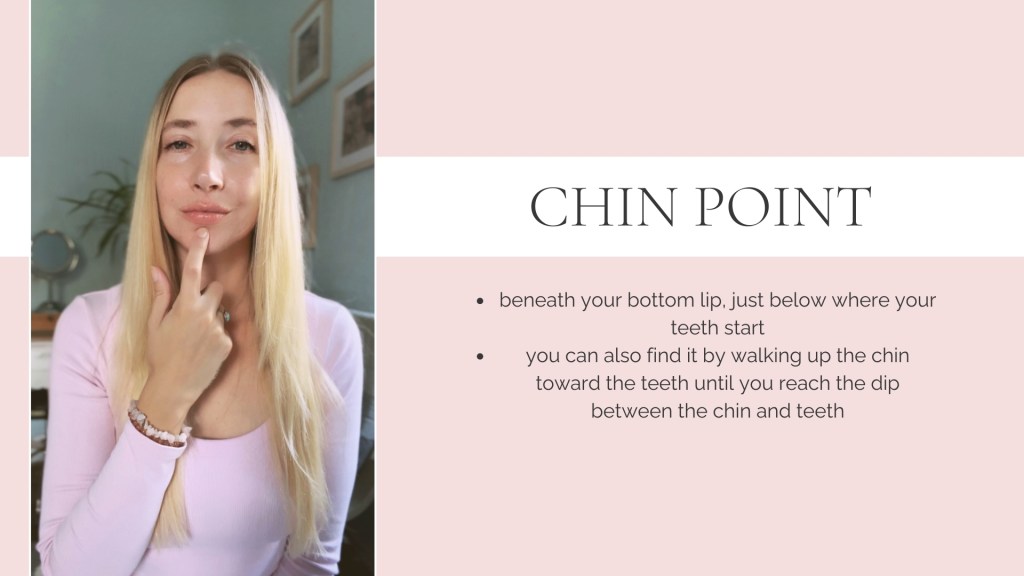
CHIN POINT
Located beneath your bottom lip, just below where your teeth start. You can also find it by walking up the chin toward the teeth until you reach the tip between the chin and teeth.
COLLARBONE POINT
Located right below the collarbone on the inner side just before it meets the sternum. If you have trouble finding this point, you can bring your shoulder forward to make the collarbone more pronounced, then follow the bone inward until you reach the sternum – the point is in the tissue, right inside that corner (feels a little bit like an open triangle) where bone meets bone.

UNDERARM POINT
Located on the side of the ribs, roughly in line with the breasts. The best way to find it is to tap the area with two to three fingers and attune to the sensations – I promise you will know when you reach the point because it tends to be a bit tender.

FINGER POINTS
All of these points are located on the outer, bottom edge of the nail (on the skin, not the nail itself) right by the nail bed. We move from the pinky finger in toward the thumb.

And once we’re done with all of these points, we circle back to the Karate Chop point one more time, then we’re through with the tapping process!
Now, if this isn’t your first EFT rodeo, you might have the same experience as me – that a lot of practitioner leave out the finger points, some skip just the ring finger, and some might also not circle back to the karate point at the very end of the recipe, instead choosing to close off the sequence at the underarm point.
Personally, I found that including all the points (as clinical EFT does) has been most effective in quickly bringing about that energetic change in my state, which is why I always use the entire sequence in my practice.
Another thing to note about the finger points is that some use the inner edge and some the outer. Several practitioners explained that it doesn’t make much of a difference which you choose to tap on, simply because they are both meridian points. I did some digging (because vague answers never satisfied me) and found that yes, there are several meridians running down our fingers, but they’re not the same. Also, in certain places there is nothing of note in Traditional Chinese Medicine. However, I experimented with which version of tapping gave me better results, and based on my observations, it was the outer edge that consistently offered the more impactful energetic shift.
This is a just a short explanation as to why I teach EFT and conduct sessions the way I do.
I highly, highly encourage you to experiment for yourself and see what you respond to best.
In the end, it’s always about what fits a specific person. So truly play around with this, note the sensations, the changes that different techniques or sequences bring, and then go with what works for you.
Another bit of advice is to explore all the points before diving into the EFT recipe. Feel around for them on your body – usually some sort of sensation will stir once you tap or press on the point and you can use that bodily feedback as a guideline. This way you’ll know that you’ll always be on the right spot.
Below, I’m typing out all the points again, this time without the additional explanations, so that you can copy & paste or screenshot them if you need a reminder…or a nice little cheat-sheet to look at while doing the tapping:
EFT POINTS:
- Karate Chop
- Top of head
- Eyebrow
- Side of eye
- Under eye
- Nose
- Chin
- Collarbone
- Under arm
- Pinky finger
- Ring finger
- Middle finger
- Index finger
- Thumb
- Karate Chop
There’s also a points sequence laid out in the free PDF guide, so make sure to grab it at the bottom of the page!
THE TAPPING TECHNIQUE
You can use one finger, two, even three (for example on the under arm point). This is all personal preference and, of course, depends on the position of the point – it would be a bit hard to tap with three fingers on the side of the eye purely because you would end up poking yourself.
Second, I recommend tapping with the tip of your finger. If you ever played ukulele or guitar, we’re talking the same positioning as you would use for holding a chord. You can absolutely tap with the pad of your finger too (especially if you have longer nails!) – it might, however, decrease the precision and strength.
And lastly, you decide the intensity of the tapping. I do say that you should aim to feel the tap, so be assertive enough with it, but also there is no reason to go into the pain category. I like a good hammer tap the most, but all in all, it’s creating sensations and vibrations that’s our ultimate goal.
So how many times do you tap each point?
The general recommendation is 15-20 taps per point.
I will add here, again, that you are always welcome to listen to your intuition.
It also doesn’t matter on which side of the body you tap the points, you can even do both at the same time if that calls to you. Again, tune in to what feels best for you.
Personally, I tend to tap with my right hand, moving down the right side of my body (except for the points on the hand & the underarm point).
Okay, have you explored all the points yet? Tried the tapping techniques to see what feels good to you? Yes? Awesome! Then we can move on to the actual process.
THE EFT RECIPE
Every single time before you begin an EFT recipe, I want you to, just briefly, tune into the issue you desire to solve. The issue can be physical pain, a mental problem, an undesired emotional state, or even a limiting belief. EFT works for a vast variety of challenges and you can literally run anything through the recipe.
If the issue is something you’re experiencing at this very moment (for instance some elbow pain), rate how you feel at the moment.
If the issue is something you might not be experiencing at its fullest or at all right now (perhaps stage fright because you have an event you have coming up that you know will trigger it), then just for a moment, imagine how it is when you are experiencing the undesired sensation.
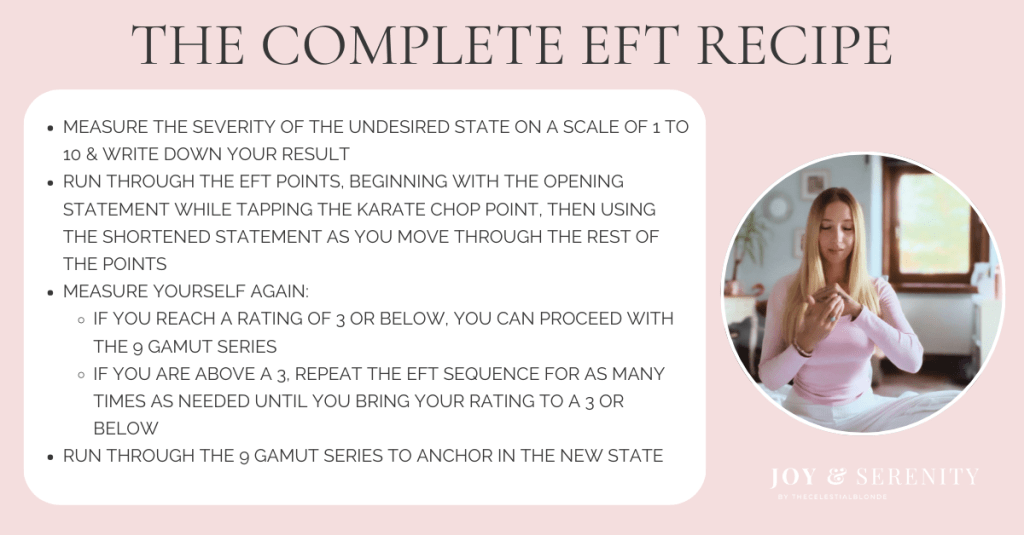
Now, on a scale from 1 to 10, with 1 meaning you aren’t bothered at all by the issue and 10 that it’s as bad as it gets, what number would you assign to your problem?
Write that number down on a piece of paper or into the notes app on your phone so that you have it for reference.
Once you’re finished with that, we can move on to the actual tapping.
The EFT recipe always starts with an opening statement that you repeat out loud three times while tapping the Karate Chop point.
“Even though I _______, I deeply and completely love myself.”
Some examples:
- Even though I have a headache, I deeply and completely love myself.
- Even though I feel stress around my finances, I deeply and completely love myself.
- Even though I’m afraid of heights, I deeply and completely love myself.
You can also put the statement in the past tense (ex. “Even though I have been afraid of heights, I deeply and completely love myself”). This can assist the mind in already placing some distance between you and the issue. However, if the statement set in the past tense doesn’t ring true to you (meaning you feel the problem is very much present, making the statement very much unbelievable), then please resume using the present tense version.
You will reap the benefits regardless of whether the statement is in present or past tense. The most important thing is to go with the type of statement your mind and your belief system can get behind. We have to tap into the truth in order to change it.
On that note, I want to briefly mention language. If English isn’t your first language or you’re multilingual, choose and translate the statements into the language you resonate with most or the one your subconscious most understand. A good hack for figuring that out is looking into your thoughts or into your dreams – which is the predominant language used there?
After setting up the opening sequence, as we move through the rest of the points, we only repeat (out loud) the issue we desire to resolve – so basically, what stood in the “_______” position of the opening statement.
For instance, a sequence for anxiety would look like this:
- (Karate point) “Even though I feel anxiety, I deeply and completely love myself.” – repeat this statement three times while tapping
- (Top of head) “Anxiety.”
- (Eyebrow) “Anxiety.”
- (Side of eye) “Anxiety.”
- (Under eye) “Anxiety.”
- (Nose) “Anxiety.”
- (Chin) “Anxiety.”
- (Collarbone) “Anxiety.”
- (Under arm) “Anxiety.”
- (Pinky finger) “Anxiety.”
- (Ring finger) “Anxiety.”
- (Middle finger) “Anxiety.”
- (Index finger) “Anxiety.”
- (Thumb) “Anxiety.”
- (Karate point) “Anxiety.”
Inhale. Exhale. Now tap into the issue.
Where on a scale from 1 to 10 are you now? Has the intensity lessened?
If you’re at a three or below, you can move onto the 9 Gamut series.
If you’re still at a 4 or higher, run through the entire process again (starting with the three opening statements and then going through the rest of the points) until your final number is a 3 or below before moving into the 9 Gamut series.
Ideally, at the end, we aim to be entirely free of the issue. Sometimes, though, simply lessening the intensity can already provide such immense relief that a person is happy with it being a 2 or a 3 on the scale.
THE 9 GAMUT SERIES
The 9 Gamut series is the closing procedure to the EFT recipe, designed to anchor in the new energy/state.
The entire sequence is done while tapping the Gamut point, which is located on the top side of the hand between the pinky and ring finger. If you follow the line between the bones from the knuckles up, you’ll find it right before the bones connect.

So begin tapping on the Gamut point and:
- look straight ahead and close your eyes for 3-5 seconds
- open your eyes
- without moving your head, look down and to your left for 3-5 seconds
- bring the gaze back to center
- without moving your head, look down and to your right for 3-5 seconds
- bring the gaze back to center
- without moving your head, roll your eyes around in one direction and then bring them back to center
- without moving your head, roll your eyes around in the other direction and then bring them back to center
- hum a tune out loud for about 5 seconds (it can be something as simple as the first few bars of Happy Birthday)
- count out loud from 1 to 5
- count out loud from 5 to 1
- once more hum a tune out loud for about 5 seconds (it can be something as simple as the first few bars of Happy Birthday)
- continue to tap on the Gamut point for another 10 to 15 taps
And that’s it! The desired energy has now been anchored and you get to enjoy the new state you created in your mind and body!
As mentioned before, I created a free PDF guide that you can download and refer back to whenever you need a refresher. It includes all the points, the EFT recipe, and the 9 Gamut series!
Either click on the image below to download or use this link.

Happy tapping!
Did you enjoy the content & want to spread some love?
You can help support the Joy & Serenity blog by buying me a coffee ♥

Leave a comment